
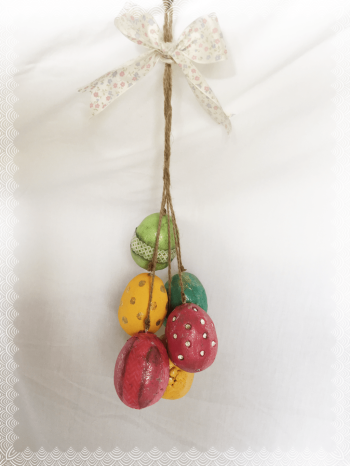
It’s almost that time of year again where we decorate our homes with spring bunnies and Easter eggs, so why not make our own decorations using plastic Easter eggs and some Creative Paper Clay®?
What you will need:
Plastic Easter eggs (you may use styrofoam ones also)
Craft paint
Sculpting tools
Jute twine or any ribbon or string you may have on hand
Ribbon for a bow
Glue
Paint brushes
Eye Pin Screws
STEPS
1. Use a paint brush to cover easter egg with white glue and set aside.

2. Break off a piece of paper clay large enough to cover and egg. It doesn’t have to be exact, you can always add more.
3. Using a rolling pin roll out the clay to be approximately between 1/8″ to 1/4″ in thickness. Once again it doesn’t have to be exact. If you don’t have a rolling pin for clay you can use bottle.

4. Once clay is rolled out place egg in middle of clay and wrap clay around the egg.

5. Using your thumbs gently push clay spreading it evenly over the egg.

6. You also want to make sure the clay forms a tight seal with the surface of the egg so we don’t get air bubbles. Rolling the covered egg in your palms applying gentle pressure helps ensure this.

5. Now it’s time to smooth the clay. You can do this with a little water using your fingers and/or a paint brush. Dip your finger in the water and gently rub on the clay. It immediately begins to become smooth. You can do the same with a paint brush to smooth out rougher patches and then use your fingers to finish. Take care not to use too much water though or you will get cracks as the clay dries.


6. I decided to add some detail when the clay was wet. This is optional. I looked for a variety of items that could be used to indent patterns in the clay. The end of a pen or marker cap, rubber stamps; the list could be endless. Look around and see what you have.

I used the end of a pen to make some dots on one egg and used a rubber stamp on another.


I set aside to dry.
Be sure to join me next week for part two of this Easter Egg Swag tutorial!
Thanks for stopping by!
Update! Here is part 2.
